Integrate the YouPay buttons with the guide below (1-2 minutes!)
Before you can add your buttons, login to your Shopify Admin Portal, and head to 'Online Store > 'Themes'. Find the theme you want to edit, then click 'Customize'.
1. Enable YouPay features.
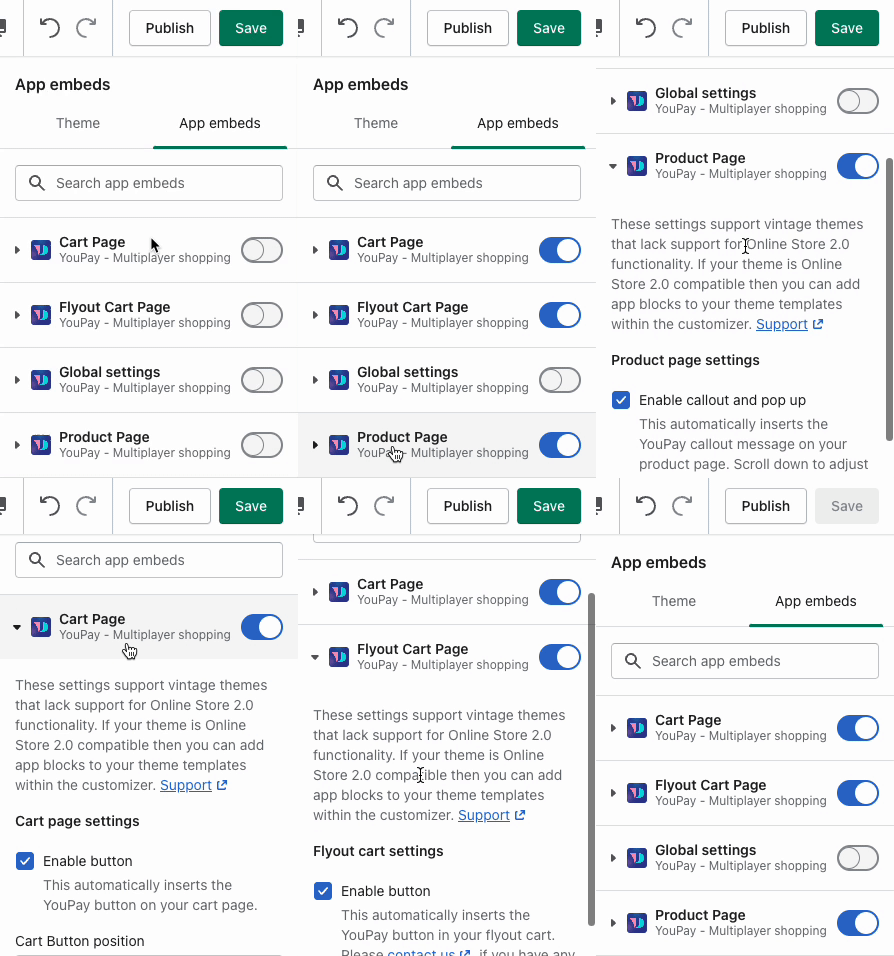
Within the customizer, click 'Theme settings' in the bottom left of your page. Click on 'App Embeds'.
Product Page
- Turn the Product page toggle ON

- Click on 'Product page' to open the Product page options
- 'Enable Callout and Pop up'
- 'Enable button'
Cart Page
- Turn the Cart page toggle ON

- Click on 'Cart page' to open the Product page options
- 'Enable button'
Flyout Cart Page (ONLY if you have a Flyout Cart Add-On)
- Turn the Flyout Cart page toggle ON

- Click on 'Flyout Cart page' to open the Product page options
- 'Enable button'
- If you're not seeing your Flyout Cart Page button added, there's a chance you'll need to hardcode this into your store - use our guide here or contact us for more guidance and information on this support@youpay.co.
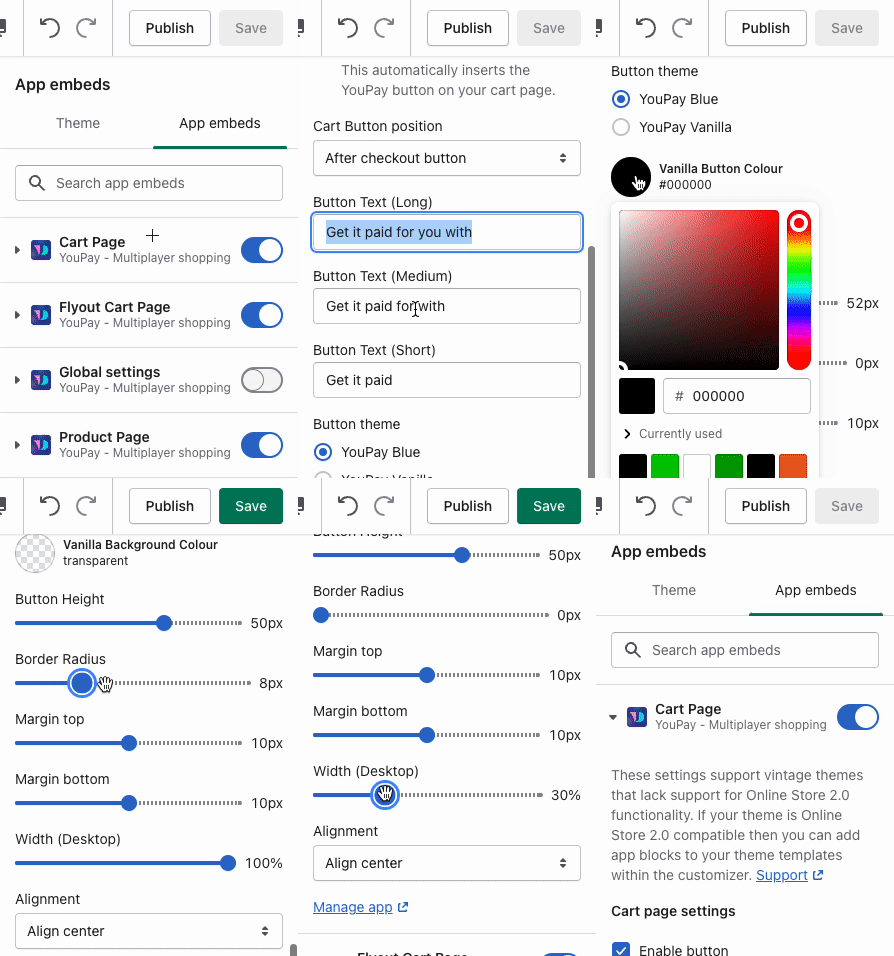
2. Customize your YouPay buttons to suit your theme! (Optional, but not required)
Under 'App embeds', scroll down and customize the size, colour, and positioning of the YouPay buttons and YouPay callout message.

If you've successfully added your buttons - great news, you're now live with YouPay!
As YouPay uses Shopify's Gift Card Template, you'll need to add your Gift Card Email template before going live, you can do so with the guide here.
Get started promoting your new Integration with YouPay!
Haven't seen the buttons added to your store? Contact our Support team at support@youpay.co for further assistance
Was this article helpful?
That’s Great!
Thank you for your feedback
Sorry! We couldn't be helpful
Thank you for your feedback
Feedback sent
We appreciate your effort and will try to fix the article
